
Share your calendar
You can share calendar information with other people by using Outlook in several ways. You can choose the method that is best for you, depending on the type of servers that you and your recipients have access to. When a colleague at another company wants to schedule a meeting with you and they can’t see your Outlook calendar, you can send a snapshot of your calendar or, better yet, an invitation to subscribe to your calendar in an email message.
If you’re using Office 365, watch these videos to learn about sharing your calendar from Outlook or Outlook Web App:
- By Email
- With people inside your organization
- With people outside your organization
- By publishing it to a web page
By Email
Share your calendar in an email
-
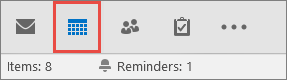
Click Calendar.
-
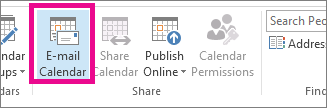
Click Home > E-mail Calendar.
-
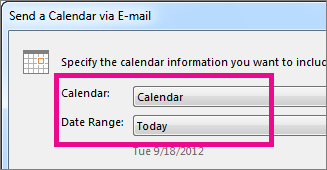
In the Calendar and Date Range boxes, pick the calendar and time period you want to share. For example, choose Today only or for the Next 7 days.
-
Set any other options you want, and then click OK.
-
In the new email that opens, add who you want the message to go to in the To field, add a message if you want, and click Send.
With people inside your organization
-
Click Calendar.
-
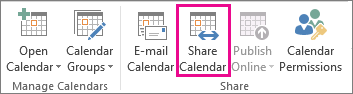
Click Home > Share Calendar.
-
In the email that opens, type the name of the person in your organization that you want to share your calendar with in the To box. In Details, specify the level of details that you want to share with the person in your organization, and then click Send.
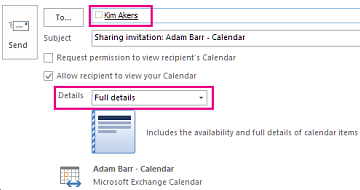
-
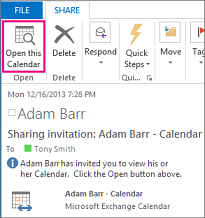
The person in your organization receives the sharing invitation in email, and then clicks Open this calendar.
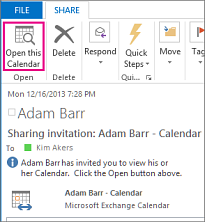
The shared calendar displays in the person’s Calendar list.
With people outside your organization
-
Click Calendar.
-
Click Home > Share Calendar.
-
In the email that opens, type the email address for the person outside of your organization that you want to share your calendar with in the To box. In Details, specify the level of details that you want to share with the person outside of your organization, and then click Send.
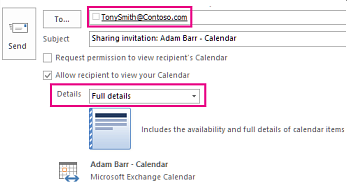
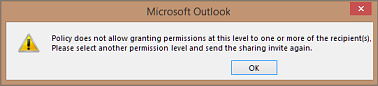
If the following error displays when you try to send your sharing invitation, you have tried to share more details than is supported by the settings in your organization. If this occurs, under Details, choose to share a different level of details. Only an admin in your organization can change the sharing policy settings for your organization. For more information, see the end of this section.
-
The person in your organization receives the sharing invitation in email, and then clicks Open this calendar.
-
The shared calendar displays in the person’s Calendar list.
If you receive an error when you try to share more details that are supported by the sharing policy settings in your organization, contact the person that manages your email account.
By publishing it to a web page
If you have access to a web server that supports the World Wide Web Distributed Authoring and Versioning (WebDAV) protocol, you can publish your calendar there.
Note: Not sure if your server supports WebDAV? Your server administrator or internet service provider (ISP) should be able to tell you.
-
Click Calendar.
-
Click Home > Publish Online > Publish to WebDAV Server.
Notes:
-
If your email account uses Exchange, you will see Publish This Calendar, instead of the option to publish to a WebDAV server. This lets you publish your calendar directly to an Exchange Server. In the window that opens, select the publishing options you want, and click Start Publishing.
-
If you're using Office 365, you can still publish your calendar to a WebDAV server, but you must first remove {Anonymous:CalendarSharingFreeBusySimple} from the sharing policy. This will prevent you from publishing your calendar to Exchange in the future, however.
-
-
In the Location box, enter the location of the WebDAV server, select any other publishing options you want, and then click OK.
Comments
0 comments
Please sign in to leave a comment.